
A content plan posts on a regular rhythm, such as every Wednesday at 9:00, to the locations or group you choose. Each date and time in the plan is a slot. In a Manual plan you write each slot’s post. In an AI plan, MX drafts the posts ahead from your Brand kit and you review them. Either way, every plan post is an ordinary post: it gets the AI policy check and goes through Approvals.
Owners, Admins and Editors create and edit plans. Every member can read them on the Content Plan page.
Create the plan
-
Open Posts → Content Plan and select New plan.
-
Give it a Plan name your team will recognize.
-
Choose the Mode:
- Manual: you write each post; every slot opens the post editor.
- AI: MX drafts posts ahead for you to review.
-
For an AI plan, pick a Direction: Balanced (rotates brand stories, offers and local news), Branding, Sales (offers and events from your Brand kit) or Local/SEO (services, categories and the area around each location). The form also shows the Brand kit the AI writes from.
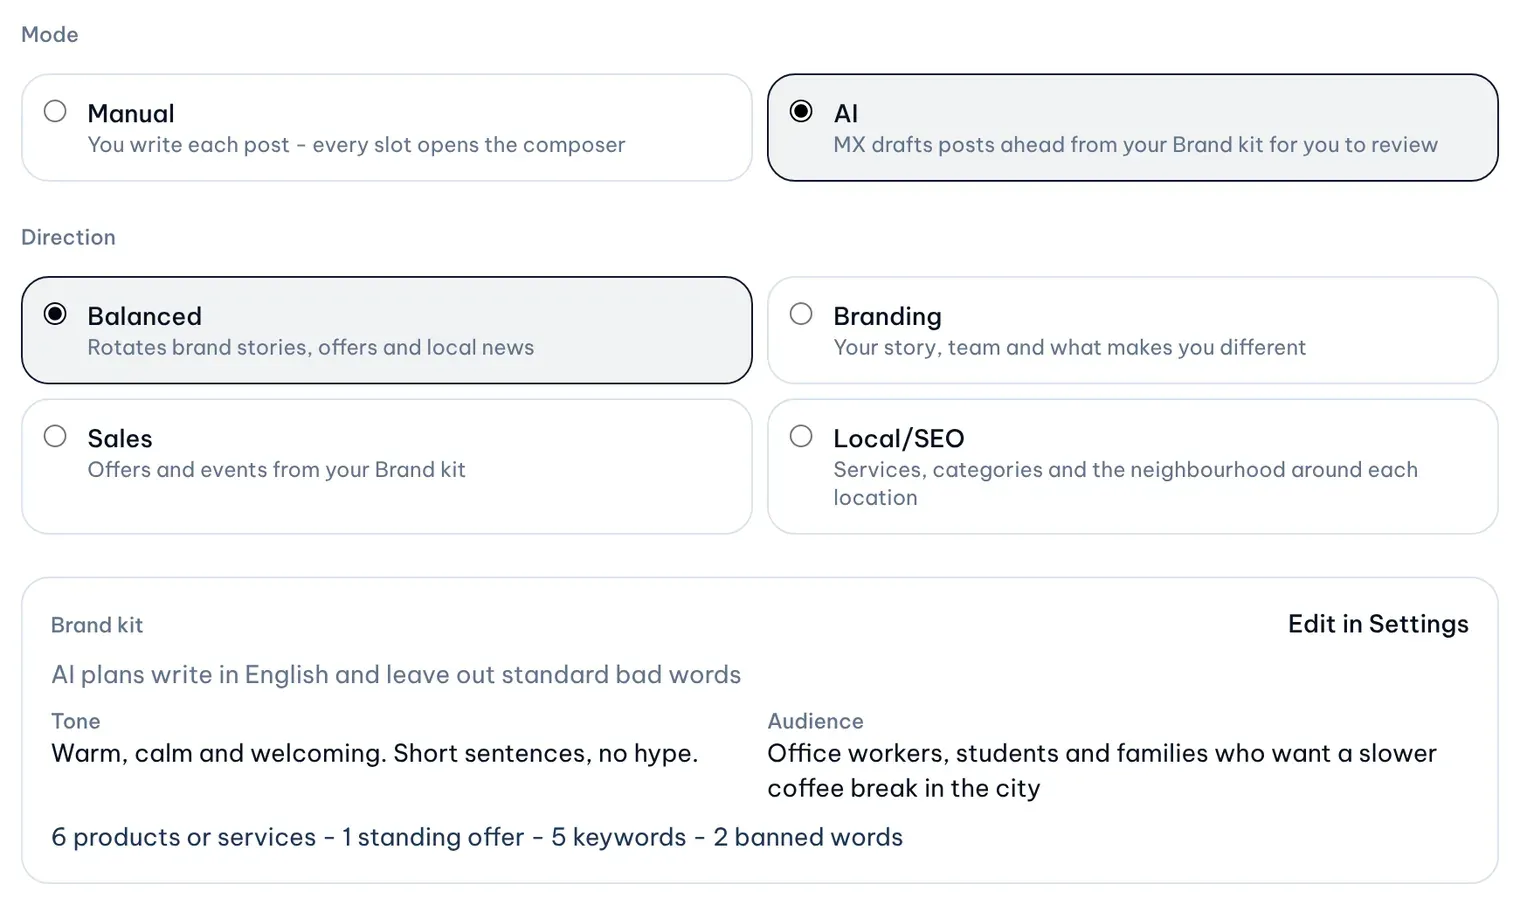
Illustrative data -
Under Cadence, choose Weekly and tick one to three weekdays, or Monthly and pick days 1 to 28 or Last day. Set the Time. Picking a direction suggests a cadence, which you can change.
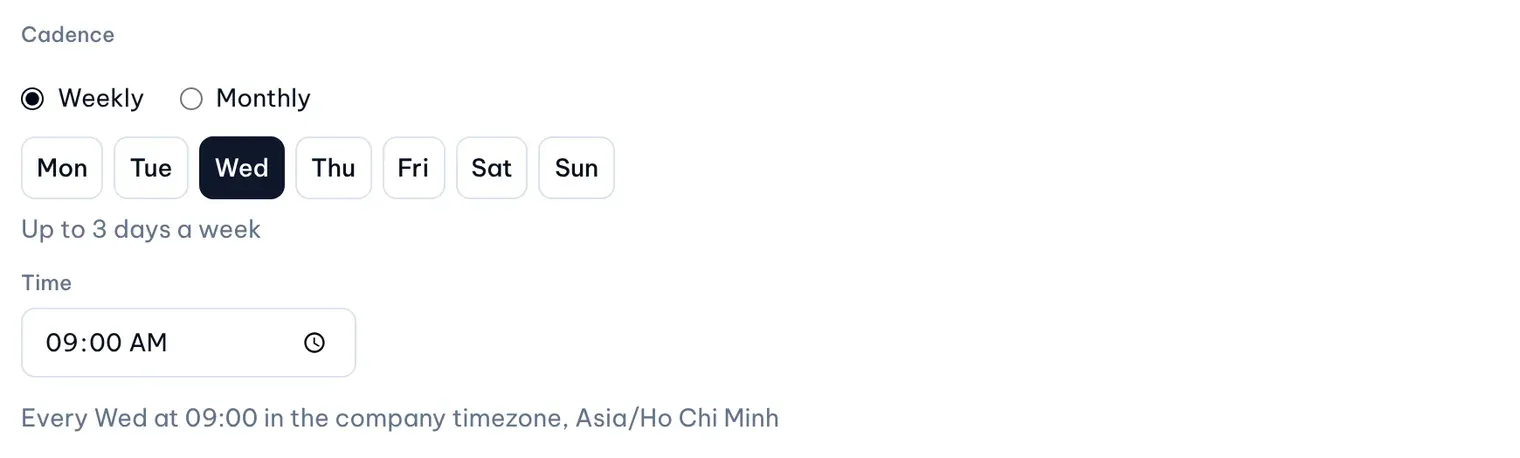
1: Weekdays. 2: Cadence summaryIllustrative data -
Under Dates, set when the plan Starts and Ends. The form counts the posts that fit and shows the most a plan can hold.
-
Under Locations, select Choose locations and tick them, or Use a group. With a group, each post goes to the locations in the group at the moment it is sent to Approvals.
-
For an AI plan, choose the number of Variants. See Personalize plan posts.
-
Select Create plan. The plan opens with the status Draft.
-
Check it, then select Activate plan. MX creates the slots and the plan becomes Active.
Times use the company timezone, shown under the cadence. A location gets at most one scheduled post a day across all plans, so MX refuses plan dates that clash with another plan, and skips any slot that would give a location a second post that day.
Write the posts of a Manual plan
- Open the plan from the Content Plan page. Slots lists each date and time with its state.
- On an Open slot, select Write post. The post editor opens with the slot’s time and the plan’s locations already set; you can’t change them there.
- Write the post and add its media. You can use Draft with AI to draft or rewrite the text.
- Select Send to Approvals, or leave the finished draft: MX sends it to Approvals by itself ahead of the slot.
To come back to a draft, select Continue writing on its slot. If nobody writes a post for a slot, MX skips that slot.
For AI plans, see Review and approve plan posts.
Pause, change or end a plan
On the plan’s page:
- Pause plan stops MX from drafting posts and sending drafts to Approvals; Resume plan starts it again.
- Edit plan changes the cadence, dates, locations or other settings. Changes apply only to slots whose posts are not in Approvals yet. A running plan keeps its mode.
- Cancel plan, then Confirm cancel, ends it early. Unsent drafts are cancelled; posts already in Approvals stay for a decision.
A plan ends on its own after its last date. MX also pauses a plan when it can’t go on, and the plan says why, for example Add locations to keep this plan going. If Google Business Profile is disconnected, every active plan pauses and only an Owner or Admin can resume it after you reconnect.